
Thermomix® Apple Crumble Bars
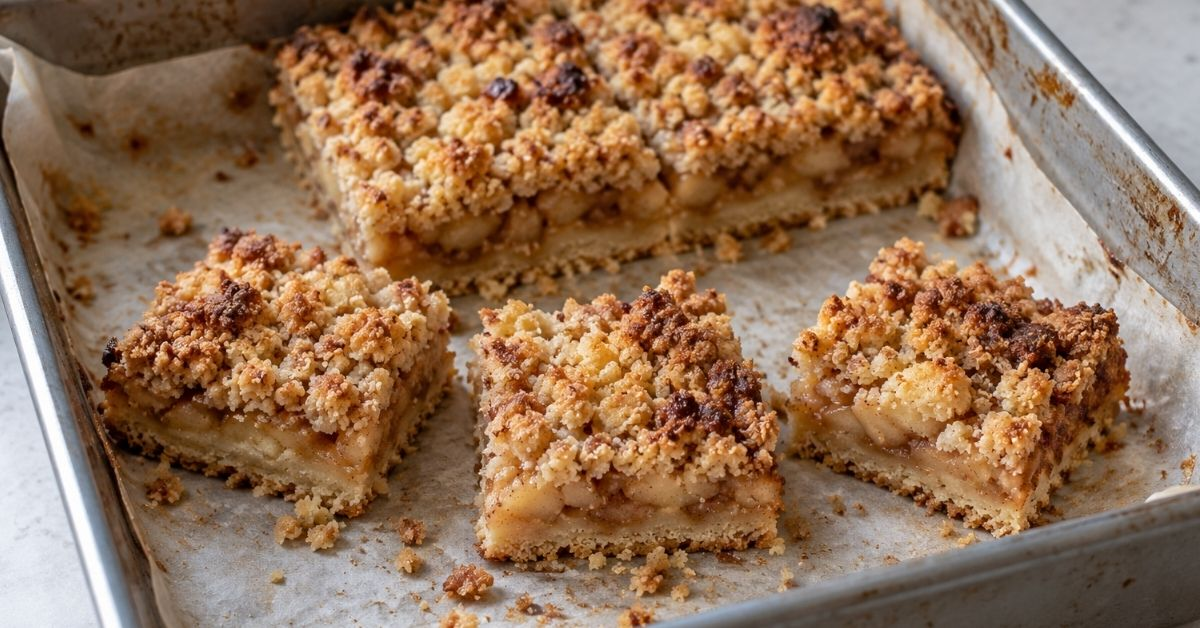
Buttery base, a generous layer of cinnamon-spiced apples and a golden crumble topping — my Apple Crumble Bars bring together everything I love about apple crumble in a handy little square.
They’re lovely with an afternoon cuppa, tucked into a picnic basket or served warm with a scoop of vanilla ice cream. And if you’re a custard lover, a generous drizzle turns them into a delicious dessert!
Your Thermomix® takes care of mixing the base and crumble, then cooking the apple filling. The same mixture is used for both the base and topping, which keeps things beautifully simple.
They freeze well too, so you can put a few aside for another day. Although finding the willpower to do that might be the hardest part! 😉
Which apples are best?
The apples you choose will influence both the sweetness and texture of your bars.
Granny Smith
My pick if you enjoy a little tartness to balance the buttery crumble. They hold their shape well during cooking, giving the filling some lovely texture.
Pink Lady
A delicious choice for a balance of sweetness and tang. They also hold their shape well, making them a good all-round option.
Jazz or Braeburn
These firm apples bring plenty of flavour and a pleasant sweet-tart balance. Either works well in a cooked filling.
Golden Delicious
A sweeter option that softens more readily during cooking. Use these if you prefer a softer apple layer, and keep an eye on the filling as it cooks.
You can also use a mixture. Granny Smith and Pink Lady make a lovely combination, giving you a little sweetness, a little tang and plenty of apple flavour.
Weigh your apples after peeling and coring: you’ll need 600 g of prepared apple for this recipe.
My tips for lovely apple crumble bars
Cut the apples evenly
Small, evenly sized pieces help the filling cook consistently and make the finished bars easier to slice. Avoid very large chunks, which may still be firm when the smaller pieces are soft.
Toss with lemon juice as you prepare
Toss the chopped apples with the 15 g lemon juice listed in the recipe to help prevent browning while you get everything ready. Add the apples and any juice in the bowl to your Thermomix® when it’s time to cook the filling.
Check the filling before assembling
Apple varieties vary in how much moisture they release and how quickly they soften. The filling should be tender and thickened, rather than watery. Stir the cornflour and water together just before adding so the cornflour hasn’t settled at the bottom.
Give the base its first bake
Baking the base before adding the filling helps it set and gives it a head start towards that lovely golden finish. Press it evenly into the tin so it cooks consistently.
Keep the crumble chilled
Pop the reserved topping mixture into the fridge while you prepare the filling. When you’re ready to assemble, crumble it over the apples in a mixture of small and slightly larger pieces for a lovely textured top.
Line your tin with an overhang
Leave baking paper extending over two sides of your 20 × 20 cm tin. Once the bars are cool, you can use it to lift the whole slab out for slicing.
Let them cool before cutting
This is the part that takes patience! The base and apple filling need time to firm up, so let the bars cool completely in the tin before slicing.
For particularly neat squares, chill the cooled slab for about an hour, then cut with a sharp knife, wiping the blade between cuts. If you serve them warm straight from the tin, expect a softer, more spoonable dessert.
How to serve them
Enjoy a square just as it is with tea or coffee, or gently warm it and add:
- Vanilla ice cream
- Warm custard
- A dollop of thick cream
- A spoonful of Greek yoghurt
A light dusting of icing sugar is a lovely finishing touch if you’re serving them to guests.
Change it up — additions and swaps
Once you’ve tried the original, have a little fun with these variations! Keep additions modest so the bars still hold together nicely.
- Apple and sultana: Add 40–50 g sultanas to the apple filling before cooking. They’ll plump up in the apple juices and bring a lovely extra sweetness.
- A little crunch: Gently mix 30–40 g chopped walnuts, pecans or flaked almonds into the reserved crumble topping.
- Apple and pear: Replace up to half the apple with firm, peeled pear. Keep the total prepared fruit weight at 600 g and check the filling has thickened before assembling.
- Berry twist: Replace 100 g of the apple with blueberries or raspberries. Fold them through after thickening the apple filling. If using frozen berries, thaw and drain first to avoid adding excess liquid.
- Citrus lift: Add finely grated lemon or orange zest to the filling for a little freshness.
- Spice it differently: Replace some of the cinnamon with mixed spice, or add a small pinch of ground ginger.
- Honey swap: Use the same weight of maple syrup instead of honey for a slightly different flavour.
My tip: Try one or two changes at a time — you still want those lovely apples to be the star!
How to store apple crumble bars
In the fridge
Once completely cool, place the bars in an airtight container and refrigerate for up to 4 days. Separate layers with baking paper to stop them sticking together.
The crumble will soften a little as it absorbs moisture from the apple filling. The bars are still delicious chilled, or you can warm them in the oven before serving.
In the freezer
Freeze the cooled bars for up to 3 months. Wrap individual portions or place them in an airtight freezer container with baking paper between the layers.
Freezing individual squares makes it easy to take out just what you need — a little treat for two without having to defrost the whole batch!
Thawing and reheating
Thaw overnight in the fridge. To warm through and freshen up the crumble, place thawed bars in a 160°C fan-forced oven for approximately 10–15 minutes. Loosely cover if the topping begins to brown too much.
You can also microwave a portion briefly if you’re after a quick warm dessert, although the topping will stay softer.
These are such a lovely way to turn a few everyday ingredients into something special. I hope they become a favourite in your kitchen too!
Thermomix® Apple Crumble Bars
Equipment
- TM5/TM6 or TM7
- 20 × 20 cm square baking tin
- Baking paper
Ingredients
Base & Crumble topping
- 200 g butter
- 300 g plain flour
- 70 g caster sugar
- 50 g brown sugar
- ½ tsp baking powder
- ½ tsp ground cinnamon
- ¼ tsp salt
- 1 egg yolk
- 1 tsp vanilla extract
Apple filling
- 600 g apples weighed after peeling and coring, cut into small pieces
- 35 g brown sugar
- 30 g honey
- 15 g lemon juice
- 1½ tsp ground cinnamon
- A pinch of nutmeg optional
- 15 g cornflour mixed with 15 g water
Instructions
- Preheat the oven 170°C fan-forced / 190°C conventional and line your tin, leaving some baking paper overhanging for lifting out.
- Place butter in the mixing bowl. Melt 3–4 min / 50°C / speed 2, until melted.
- Add the remaining base ingredients. Mix 10 sec / speed 4. I
- Reserve one-third of the mixture in the fridge for the topping. Press the remaining two-thirds evenly into the tin.
- Bake the base for 15–18 minutes, until lightly golden.
- Meanwhile, place apples, brown sugar, honey, lemon juice, cinnamon and optional nutmeg into the mixing bowl. Cook 8 min / 100°C / reverse / spoon speed.
- Add the cornflour slurry. Cook 2 min / 100°C / reverse / spoon speed.
- Spread the apple filling over the baked base. Crumble the reserved mixture over the top.
- Bake for 25–35 minutes, until golden.
- Cool completely in the tin before cutting. For neater squares, chill for an hour once cooled.